
How To Create Custom Glitter Sneakers: An Easy DIY Tutorial for Beginners
Share
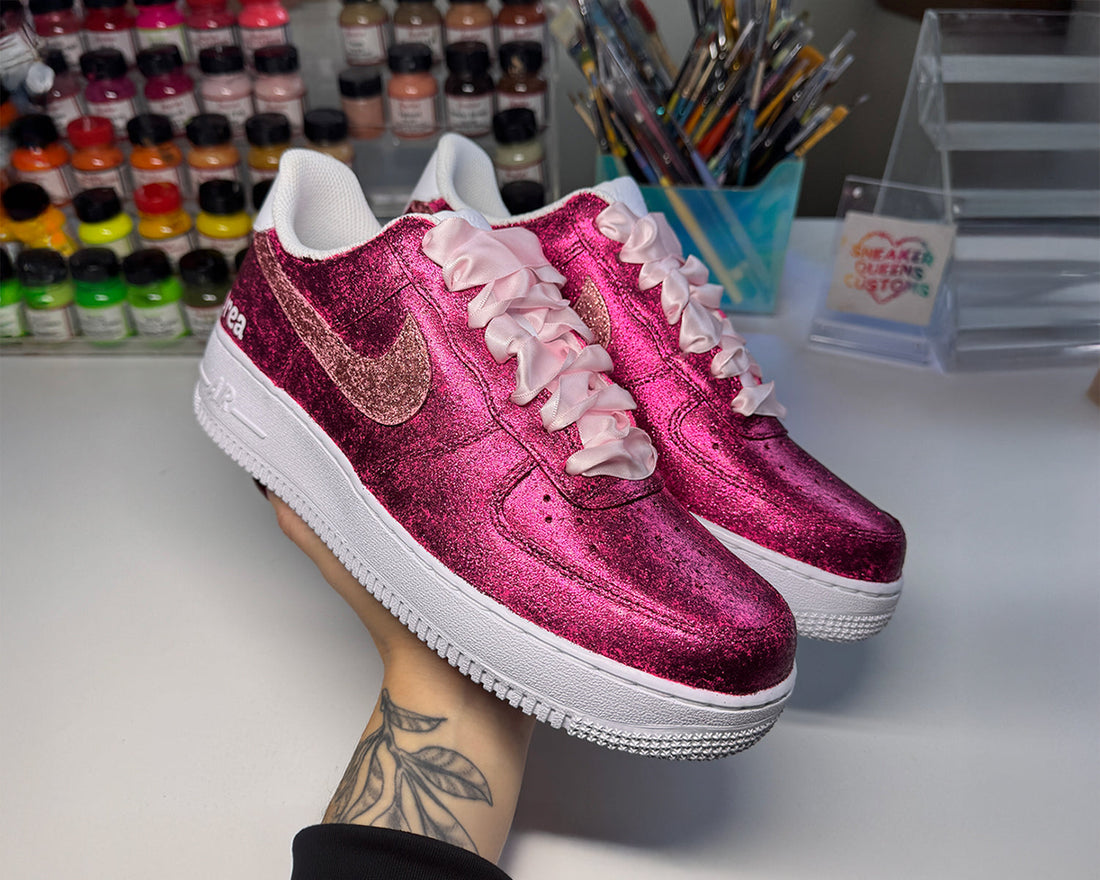
How To Create Custom Glitter Sneakers
Custom glitter sneakers are a simple and personalizable way to elevate your footwear game and stand out from the crowd. By using paintable glitter, complementary undercoat colors, and quality finishes, you can transform your plain white kicks into dazzling statement pieces!
In this tutorial, I‘ll walk you through every step of the process, incorporating expert tips and professional customizing techniques to ensure a high quality, durable finish.
Supplies You’ll Need
You can click on each product below for easy ordering!
- Leather shoes (This tutorial is for leather sneakers, but you can follow these steps for high heels as well!)
- Angelus Leather Preparer & Deglazer and cotton pads: Essential for removing the factory finish and oils on shoes.
- Angelus Leather Paint: Choose a shade that closely matches your glitter color for complete coverage.
- Glitterlites Paintable Glitter: The key ingredient for adding sparkle!
- Paintbrushes: A filbert or flat brush works great for both glitter application and the paint under layer.
- Masking Tape: To protect areas you don’t want painted.
- Angelus 4-Coat Finisher (I recommend Satin or High Gloss): To seal and protect your hard work.
- Gloves: For keeping your hands protected and paint free.
- For extra customization, you can use satin ribbon shoelaces to really bring the custom together!
Prepping Your Sneakers for Paint and Glitter
- Clean and Deglaze: Start by removing the factory finish. Use Angelus Leather Preparer & Deglazer with a cotton pad to wipe down the surface. Deglazing your shoe is an absolutely crucial step to ensure your paint and glitter will adhere to the shoe the best, so make sure to take your time really wiping down the shoes.
- Mask Off Unwanted Areas: Apply masking tape to soles, sock liners, and any sections you don’t want covered in glitter. Take your time and press firmly along the tape edges to prevent paint seeping through. (You’ll thank yourself later!)
Applying the Paint Undercoat
Before the glitter goes on, you need a base layer of regular Angelus acrylic paint that compliments the glitter color. This is crucial because the Glitterlites applies sparingly at first, making a matching undercoat essential for a solid, full-coverage appearance.
- Choose the Right Color: Pick a paint shade close to your glitter hue. For example, if you’re using ‘Razzberry’ Glitterlites, start with a pink undercoat.
- Apply Thin Coats: Use a flat brush to paint thin, even layers of color. Let each coat dry thoroughly to avoid streaks or clumps.
- Check for Evenness: Inspect the base color under good lighting. Try rotating the sneaker around in different lighting to thoroughly check out your paint job. The smoother and more even the undercoat is, the better your glitter layer will look!
Applying Glitterlites Paint for Maximum Sparkle
Now comes the fun part—adding that eye catching glitter! (
- Use the Right Brush: The Glitterlites instructions recommend a Filbert or flat brush. These brush types help you spread the glitter as evenly as possible.
- Apply Thin Layers: Start with a light coat of Glitterlites, using gentle back-and-forth strokes without brushing excessively. It’s better to build up coverage gradually than to try to get full sparkle in one go, otherwise you’ll be left with chunky glitter that is way more likely to crack or fall off.
- Dry Between Coats: Allow each glitter layer to dry completely before adding another. Typically, you might need quite a few coats to achieve the dazzling effect you’re after.
- Adjust as Needed: Check your work in different lighting conditions. If any area looks sparse, add another layer. Patience is key for a stunning, sparkly shoe!
Sealing and Protecting Your Custom Glitter Sneakers
Sealing your design with a finisher helps lock in the sparkle and protect it from wear, moisture, and dirt.
- Choose a Finisher: Angelus 4-Coat Finisher comes in multiple different sheens. Satin offers a subtle sheen, while High Gloss provides extra shine—perfect for enhancing your glitter.
- Apply 2-3 Coats: Use a clean, flat brush for finishers. (You can also use an airbrush for application if you have one.) Make sure to evenly apply over every section of the shoe. Let each layer dry fully before adding another.
- Cure Time: Allow your sneakers to set for 24-48 hours before wearing them. This curing time ensures the finisher bonds fully and the paint dries completely, extending the life of your customization.
Custom Shoe Maintenance and Care
- Gentle Cleaning: If your glitter sneakers get dirty, use a damp cloth and mild soap cleaner. Avoid harsh chemicals or scrubbing.
- Proper Storage: Keep your custom shoes away from direct sunlight when not wearing. Applying finisher makes your sneakers waterproof so no need to worry about rain, but avoid submerging the shoes in water.
- Durability: With proper prep, sealing, and careful wear, your custom glitter sneakers should maintain their shine for countless wears.
Now that you know the ins and outs of creating custom glitter sneakers, it’s time to put your new skills into action. Grab your supplies, queue up your favorite tunes, and enjoy the creative process.
Disclaimer: The links above are affiliate links, which means I make a small percentage of the sale. No additional cost to you whatsoever. but it does support me alittle! :)